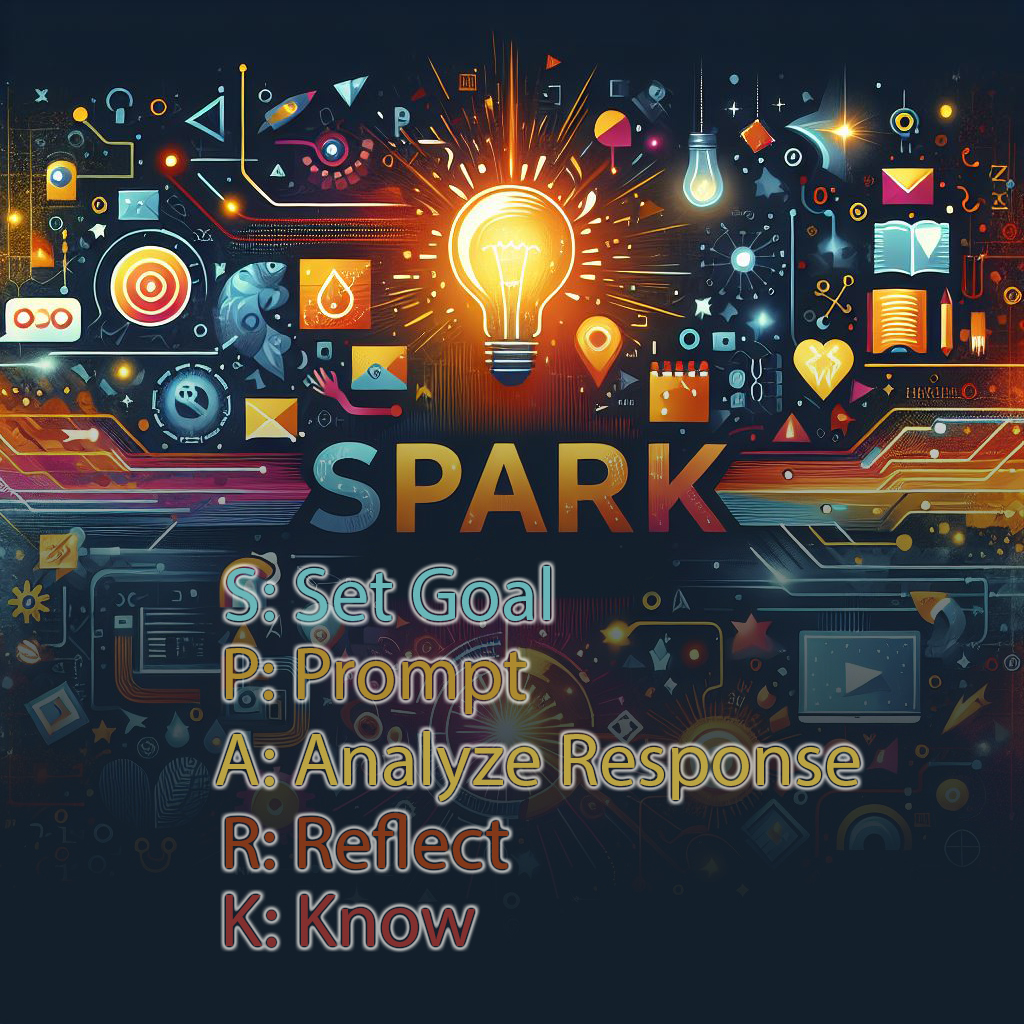
Created with S.P.A.R.K!
We continue to develop our Hangman game using HTML, CSS, JavaScript, and Bootstrap5. This chatlog documents our journey, showcasing how we collaborated with AI to build the game step by step. Each interaction is designed to help you understand the development process, from initial ideas to final implementation.
Copilot created the inspirational 'SPARK' image after suggesting the acronym that we attempt to follow as we do our development.
Note: All AI responses in this chatlog were generated using the Gemini 2.5P Pro (Preview) model. However, as we were developing code for the HTML Understanding Quiz, we experienced a 'rate limit exceeded' error, which prevented us from continuing to use the Gemini model.
As a result, we switched to GPT-4.1 model for the remainder of our chatlog interactions. Unfortunately, despite its protests to the contrary, it failed to add documentation about the quiz-generation process.
We may try to document the quiz-generation process later. Meanwhile, dialog starting with questions about the pre
Remember: You can view our Hangman-Stg1 Chatlog to see what led up to this point in our development!
Okay, I can help you add subtle "to top" and "to bottom" hyperlinks to your hangmanStg2_EssentialHTML.html page. These links will be fixed at the bottom-right of the viewport for easy access on a long page.
Here's how you can modify your HTML:
- Add an anchor point just before the closing
</body>tag. This will be the target for the "to bottom" link. - Add a
divcontaining the two links ("Top" and "Bottom") also just before the closing</body>tag. Thisdivwill be styled to be fixed at the bottom-right of the screen.
<!-- filepath: c:\Users\kpendleton\OneDrive - trinity christian academy\Subjects\Programming\JavaScript\Projects\Hangman2025\HMan2025-06-04-Stg2\hangmanStg2_EssentialHTML.html -->
<!-- ...existing code... -->
<div class="alert alert-info mt-4">
<strong>Tip:</strong> View the page source (<kbd>Ctrl+U</kbd> or right-click > "View Page Source") to see all the HTML in context.
</div>
</div> <!-- This is the closing tag for div.container.bg-white.p-4.rounded.shadow-sm -->
<!-- Anchor for the "to bottom" link -->
<div id="pageBottomAnchor" style="height: 1px; visibility: hidden;"></div>
<!-- Fixed navigation controls for Top/Bottom -->
<div style="position: fixed; bottom: 1rem; right: 1rem; z-index: 1000;">
<a href="#" class="btn btn-light btn-sm border shadow-sm" title="Go to top" aria-label="Go to top">↑ Top</a>
<a href="#pageBottomAnchor" class="btn btn-light btn-sm border shadow-sm ms-1" title="Go to bottom" aria-label="Go to bottom">↓ Bottom</a>
</div>
</body>
</html>
These changes will add two small buttons at the bottom-right of the page.
The "↑ Top" button will scroll the page to the top.
The "↓ Bottom" button will scroll to the very end of the page content.
They are styled using Bootstrap classes (btn btn-light btn-sm border shadow-sm) for a subtle appearance and include title and aria-label attributes for accessibility. The ms-1 class on the second button adds a small margin between them.
Okay, I've started the chatlog for Stage 2 in hangmanChatlogStg2.html by adding your last request and my response, including the details about the "to top" and "to bottom" links, as you can see above. We can continue to append our interactions here.
You're referring to HTML entities.
- What they are: In HTML, certain characters are reserved, like
<,>,&,", and'. To display these characters literally in your web page content (e.g., when showing HTML code in a<pre>block), you need to use their corresponding HTML entities.<represents<(less than)>represents>(greater than)&represents&(ampersand)"represents"(double quote)'represents'(single quote/apostrophe)
- Why I use them: When I provide you with HTML code to be displayed as text on your webpage (like in the chatlog or in the
<pre>blocks of your tutorial pages), I use these entities. This ensures the browser displays the characters<and>as literal less-than and greater-than signs, rather than interpreting them as the start or end of an HTML tag. - What would happen if I didn't use them: If I provided raw HTML like
<div>directly within a<pre>tag meant to show that code, the browser would try to render that<div>as an actual HTML element. This would break the intended display of the code snippet. For example, instead of seeing the text<div>, you might see nothing, or the layout of your page might be altered, because the browser would treat it as part of the page's structure.
You're right, HTML entities are a great example of something important that could be added to your hangmanStg2_EssentialHTML.html page. Based on the HTML used across your project files, here are a few more suggestions for topics to include or expand upon in your essentials guide:
- HTML Entities: As you mentioned, explaining characters like
<,>,&, etc., is crucial, especially since you're displaying code snippets. - HTML Comments:
<!-- ... -->are used in your files and are fundamental for code documentation and readability. - Semantic HTML Elements:
- You're already using
<nav>(in all files) and<footer>(inhangmanStg2.html). - The
hangmanChatlogStg2.htmluses<figure>and<figcaption>. - Explaining why these are preferred over generic
<div>s for certain content can be very helpful (e.g., for accessibility and SEO).
- You're already using
- Images:
- The
<img>tag with itssrcandaltattributes is fundamental. You use this inhangmanChatlogStg2.html. - Mentioning
<figure>and<figcaption>as a way to group images with captions would be a good addition here too.
- The
- More on Lists:
- You cover
<ul>in "Common HTML Elements Used." You could explicitly mention<ol>(ordered lists) as well, and perhaps show an example, as they are very common. The AI response in your chatlog uses<ol>.
- You cover
- Basic Text Formatting Tags:
- You use
<strong>and<code>extensively. - The
hangmanStg2_EssentialHTML.htmlpage itself uses<kbd>for keyboard input. - A small section on these common inline formatting tags would be beneficial.
- You use
- The
<hr>Tag:- You use
<hr>inhangmanChatlogStg2.htmlandhangmanStg2.htmlfor thematic breaks. It's simple but worth a brief mention.
- You use
You could integrate these as new sections or as sub-points within your existing sections. For example, HTML Entities could be a new section, while <footer> and <figure> could be discussed under a "Semantic HTML" section or as additions to "Common HTML Elements Used."
Okay, I'll add a new section titled "8. Additional HTML Features in Stage 2" to your hangmanStg2_EssentialHTML.html file, right after the current "7. Navigation & Linking Between Pages" section. The existing "Putting It All Together" section will be renumbered to "9."
Here's the code for the new section and the updated "Putting It All Together" section:
<!-- filepath: c:\Users\kpendleton\OneDrive - trinity christian academy\Subjects\Programming\JavaScript\Projects\Hangman2025\HMan2025-06-04-Stg2\hangmanStg2_EssentialHTML.html -->
<!-- ...existing code... -->
<pre><code><a href="hangmanStg1a.html" class="btn btn-outline-light btn-sm">Game</a>
<a href="hangmanChatlogStg1.html" class="btn btn-outline-light btn-sm">AI Chatlog</a>
</code></pre>
<h2 class="section-title">8. Additional HTML Features in Stage 2</h2>
<p>
As our project grows, we incorporate more HTML features to enhance structure, readability, and content presentation. Here are some notable additions in Stage 2:
</p>
<ul>
<li>
<strong>HTML Entities:</strong> To display reserved characters like <code>&lt;</code>, <code>&gt;</code>, or <code>&amp;</code> as text (especially in code examples), we use HTML entities (e.g., <code>&lt;</code>, <code>&gt;</code>, <code>&amp;</code>). This is crucial for accurately showing code on tutorial pages like this one and in the chatlog.
<pre><code><p>This shows a &lt;div&gt; tag.</p></code></pre>
</li>
<li>
<strong>HTML Comments:</strong> We use <code><!-- ... --></code> to add comments within our HTML. These are not displayed by the browser but help developers understand the code or temporarily disable parts of it.
<pre><code><!-- This is a comment, hidden in the browser --></code></pre>
</li>
<li>
<strong>Semantic HTML Elements:</strong>
<ul>
<li><code><nav></code>: Defines a set of navigation links (used for our main site navigation).</li>
<li><code><footer></code>: Defines a footer for a document or section (used for copyright or last updated information).</li>
<li><code><figure></code> and <code><figcaption></code>: Used to group media content (like images) with a caption. Seen in our chatlog for the S.P.A.R.K. image.</li>
</ul>
<p>These tags give more meaning to our content, improving accessibility and SEO.</p>
</li>
<li>
<strong>Images (<code><img></code>):</strong> The <code><img></code> tag embeds images. Key attributes include <code>src</code> (image source URL) and <code>alt</code> (alternative text for accessibility and if the image fails to load).
<pre><code><img src="images/sparkImg.jpg" alt="S.P.A.R.K. Acronym Graphic"></code></pre>
</li>
<li>
<strong>Ordered Lists (<code><ol></code>):</strong> While <code><ul></code> creates bulleted lists, <code><ol></code> creates numbered lists. Useful for step-by-step instructions or ranked items.
</li>
<li>
<strong>Basic Text Formatting:</strong>
<ul>
<li><code><strong></code>: Indicates text with strong importance (usually bold).</li>
<li><code><code></code>: Marks a fragment of computer code (styled in our project).</li>
<li><code><kbd></code>: Represents user keyboard input (e.g., <kbd>Ctrl+U</kbd>).</li>
</ul>
</li>
<li>
<strong>Thematic Break (<code><hr></code>):</strong> The <code><hr></code> tag creates a horizontal rule, representing a thematic break or a separation between content sections.
</li>
</ul>
<h2 class="section-title">9. Putting It All Together</h2>
<p>
By combining these HTML elements, attributes, and Bootstrap classes, you create a clean, interactive, and responsive web app. Explore the <a href="hangmanStg2.html">game</a> and <a href="hangmanChatlogStg2.html">chatlog</a> to see these features in action!
</p>
<!-- ...existing code... -->
Okay, I've added our recent discussion about updating the "Essential HTML" page to the hangmanChatlogStg2.html file, as you can see above.
Absolutely! I added a description for the <pre> (preformatted text) tag under "Basic Text Formatting" in Section 8. The <pre> tag preserves both spaces and line breaks, displaying text exactly as written in the HTML source. It's best used for code samples, ASCII art, or any content where whitespace and formatting matter. Example usage:
<pre>
function hello() {
    console.log("Hello, world!");
}
</pre>
Yes, it is theoretically possible to embed AI into your Hangman game page so that a user can specify a theme (like "Marvel heroes") and have the game generate puzzles based on that theme in real time.
- How it could work: The user enters a theme, the AI generates a list of words or phrases related to that theme, and the game uses this list for Hangman puzzles.
- What you would need: Access to an AI service or API to generate themed word lists, JavaScript to communicate with the AI, and logic to update the game’s word pool.
- Benefits: The game becomes highly personalized and engaging, adapting to user interests.
- Considerations: You’d need to handle API calls, possible costs, privacy, and content moderation.
In summary: Yes, with the right AI integration, your Hangman game can adapt in real time to user-supplied themes!
Added! When you're ready to explore implementation, I can guide you through integrating AI services, handling user input, and updating your Hangman game logic to support dynamic, theme-based puzzles. Just ask for help whenever you're ready to take the next step!
Absolutely! I created hangmanIndex.html as a hero-style intro page with a brief history of Hangman, your artwork as a background, and Bootstrap 5 tiles for each stage. Each tile features a description and a link to the corresponding stage. The design is responsive and easy to expand as you add more stages. See the code above for details, and let me know when you're ready to add more stages or features!